New Jekyll Themes Template - Cubber Project
Modern Unique Elegant Futuristic Jekyll Theme Template - Cuber - Multipurpose Themes - SEO Jekyll Support for your website and blog project.
themestemplate • website-themes • website-template • blog-themes • blog-template • github • themes • template • blog • jekyll • jekyllthemes • featuredpremium • jamstackthemes • premiumthemes •
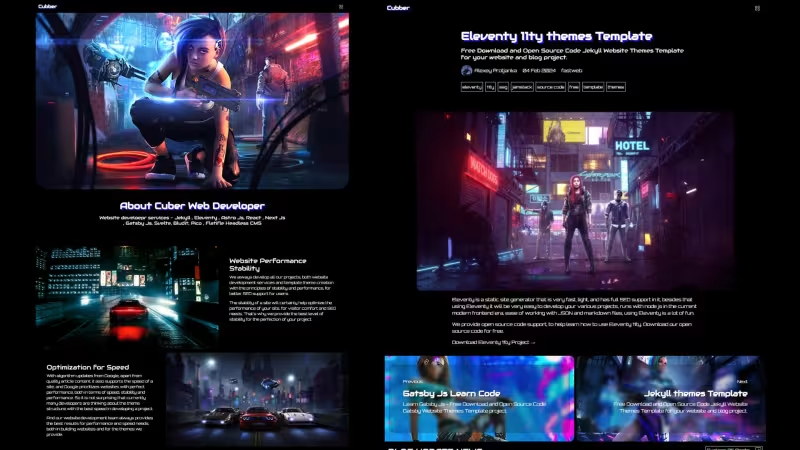
Table Of Content
- New jekyll JAMSTACK themes template - Cubber futuristic concept
- INSTALLATION CUBBER PROJECT
- FOLDER STRUCTURE
- PROJECT CONFIGURATION
- Title and Description Website
- Cover Image and Navigation
- Widget Setup
- Footer Section
- Blog Post List
- Complete YAML Code Example
- TAG SETUP
- CATEGORIES SETUP
- SEARCH SETUP
- HOME PAGE
- ABOUT PAGE
- SERVICES PAGE
- GALLERY PAGE
- CONTACT PAGE
- AUTHOR PAGE
- BLOG PAGE
- SEO SCRIPT
- GITHUB PUSH
- HOSTING DEPLOY
- HEADLESS CMS
- BONUS SEO TIPS
- THANK YOU
New Jekyll Themes Template - Cubber Project
New jekyll JAMSTACK themes template - Cubber futuristic concept
Develop your modern and fast website with jekyll ruby on rails !!
https://www.youtube.com/watch?v=TnHdusG-6mU
Modern and Futuristic Concept Design for your multipurpose website project.
INSTALLATION CUBBER PROJECT
How to install new jekyll themes template cubber project.
Local Installation
To install it on your device, and you can update everything on your device before making your site online.
Jekyll Installation
Need to install Jekyll on your Devices, Read Documentation Page
How to
- Download Source Code Project
- Create project folder on desktop and name project folder with cubber and extract cubber source code
- Open terminal access your project folder ,example
cd C:\Users\usernmae\desktop\cubberchangeusernamewith yourpc name - Run bundle install
- Next Run bundle exec jekyll serve or jekyll serve
- Open web browser access on localhost:4000
- Next Step Learn about Folder Structure and setup your site
-----
Cloud Installation
Option to change and update directly online via your GitHub repo. and get your site online.
- Download Cubber Source Code Project
- Create Github Account
- Create New Repo name it with your project
- Clone your github repo project in to local devices
git clone https://username@github.com/username/yourrepo.git- changeusernamewith your github username and changeyourrepowith your github repo project. - Extract Cubber source code in to your project folder
- Run git add . && git commit -m "first commit'
- Run git push - read github documentation - need create Personal access tokens
- Github Pages - If you want deploy on github, you can use github pages , click on Settings - Build and deployment - Branch - Select master or main - and save
- Custom Domain on Github Pages - Open Settings - Custom domain - and add your domain - save, next we can create CNAME files on root repo project, and insert your domain name. Next you need to add A text on your domain panel
- Netlfiy / Vercel / Cloudflare - You can register on static host with your github account, create new poject or pages - select your github repo project and click deploy
- Custom Domain on Netlify / Vercel / Cloudflare - For use your domain name, you can click on settings - custom domain and add your domain name , next you need to configure A or DNS record from cloudflare , netlify or vercel
-----
FOLDER STRUCTURE
{:loading="lazy"}
- _authors - Folder for author content article page
- _galleries - Folder for galleries content article page
- _includes - Folder for widget design themes layout
- _layouts - Folder for layout themes template
- _posts - Folder for article blog post
- _services - Folder for services article content
- assets - Folder for static files storage
- authors - Folder for author page design layout
- blog - Folder for blog page design layout
- gallery - Folder for galleries page design layout
- services - Folder for services design page layout
- _config.yml - Website Configuration files
- 404.html - Layout for 404 or not found page
- about.md - Files for update your about content
- categories.html - Folder for categories design layout
- Gemfile - Gem Jekyll Installation
- index.md - Files for update your index home page
- search.html - Files for Search design layout
- tag.html - Files for tags design layout
-----
PROJECT CONFIGURATION
First, we need to set up our new jekyll themes site, access the _config.yml file and open it using a code editor, then adjust it to your needs.
Title and Description Website
Update your title, description for SEO , change favicon ,lang ,and url
YAML Format
title: Insert title here..
slogan: Slogan for navigation widget here..
description: Insert your description in here....
favicon: Your favicon website image here... you can use cdn or /assets/img/yourfaviconfile.png
locale: locale for website
lang: insert website language
url: 'input your website domain here..'
Cover Image and Navigation
Set the cover image and website navigation
image: your cover image here...
# navigation setup
nav:
 - title: Navigation name here...
   icon: Icon image for navigation..
   link: URL link navigation in here..
 - title: Home
   icon: /assets/img/icon/home.png
   link: /
# to add new navigation you can copy and paste the frontmatter form example or add this code - then change it to suit your needs
 - title: New navigation
   icon: Url image for new navigation
   link: URL Link for new navigation
output:
Widget Setup
Set and configure your website widgets
# For setup your services widget area
services_widget:
 title: OUR SERVICES # title for services widget in here
 show: 3 # number of services widget content views
 text: Explore All Services # button text in here..
 link: /services # this is the url page for the services list
# For setup your blog widget area
blog:
 title: BLOG UPDATE NEWS # title for blog widget in here
 show: 3 # number of blog widget post views
 text: Explore All Posts # Button text for blog widget
 link: /blog # Link for blog list page
# For setup your galleries widget area
gallery:
 title: The Project Galleries # title for gallery widget in here
 description: Your gallery description in here..
 text: See Galleries # Button Text
 link: /gallery # Link for galleries page
 image: /assets/img/projectgallerycoverwebthemes.webp # cover image in here..
output:
Footer Section
Setup for Footer widget section such cover , title, description, navigation, and social media
footer_nav:
 title: Title for footer section..
 text: Insert footer description in here...
 image: URL or CDN Cover image here..
footer_nav_list:
 - title: Nav menu name here...
   link: Link URL goes here....
 - title: Home
   link: /
 - title: About
   link: /about
 - title: Facebook
   link: https://creativitas.vercel.app
 - title: Twitter
   link: https://creativitas.web.app
 - title: Instagram
   link: https://creativitas.netlify.app
 - title: Youtube
   link: https://creativitas.github.io
output:
Blog Post List
Setup for Blog post and pagination
paginate: 6 # Number for blog post views
paginate_path: "/blog/page:num/" # No need to change
output:
Complete YAML Code Example
title: Cubber
slogan: Cubber
description: New and Modern JAMSTACK Jekyll Astro Js Eleventy 11ty Website Themes Template
favicon: /assets/img/author.jpg
locale: en_EN
lang: en
url: ''
image: /assets/img/cuber-cover.webp
nav:
 - title: Home
   icon: /assets/img/icon/home.png
   link: /
 - title: About
   icon: /assets/img/icon/about.png
   link: /about
 - title: Services
   icon: /assets/img/icon/services.png
   link: /services
 - title: Gallery
   icon: /assets/img/icon/gallery.png
   link: /gallery
 - title: Blog
   icon: /assets/img/icon/blog.png
   link: /blog
 - title: Contact
   icon: /assets/img/icon/contact.png
   link: /contact
services_widget:
 title: OUR SERVICES
 show: 3
 text: Explore All Services
 link: /services
blog:
 title: BLOG UPDATE NEWS
 show: 3
 text: Explore All Posts
 link: /blog
gallery:
 title: The Project Galleries
 description: We have handled many customers from all over the world, especially for modern website development needs using JAMSTACK technology - Jekyll, Eleventy, Astro Js, Gatsby Js and others. Our Web development team also provides JAMSTACK Jekyll, Astro Js, Eleventy 11ty theme templates to use, from free to premium.
 text: See Galleries
 link: /gallery
 image: /assets/img/projectgallerycoverwebthemes.webp
footer_nav:
 title: Cuber Project
 text: New and Modern JAMSTACK Jekyll Astro Js Eleventy 11ty Website Theme Template, For your Multipurpose website project, very complete with home page, about page, contact form contact page integration, Services page and details, blog page and blog details, Author Profile, SEO Ready with automatic SEO injection by Jekyll SEO plugin.
 image: /assets/img/footerjekyllthemestemplate.jpg
footer_nav_list:
 - title: Home
   link: /
 - title: About
   link: /about
 - title: Services
   link: /services
 - title: Gallery
   link: /gallery
 - title: Blog
   link: /blog
 - title: Contact
   link: /contact
 - title: Author
   link: /authors
 - title: Search
   link: /search.html
 - title: Facebook
   link: https://creativitas.vercel.app
 - title: Twitter
   link: https://creativitas.web.app
 - title: Instagram
   link: https://creativitas.netlify.app
 - title: Youtube
   link: https://creativitas.github.io
paginate: 6
paginate_path: "/blog/page:num/"
TAG SETUP
you can change configuration for tag page on tag.html open with code editor and change title, description and image cover.
CATEGORIES SETUP
you can change configuration for categories page on categories.html open with code editor and change title, description and image cover.
SEARCH SETUP
you can change configuration for search page on search.html open with code editor and change title, description and image cover.
-----
HOME PAGE
To update your home area - open the index.md file - then change the frontmatter to your needs.
Header Area
Header area section
title: Title for your home page area..
description: Description here...
image: URL or CDN Cover Image for Home page here...
button: Button Text...
link: URL button goes here..
output:
Intro List
Intro area section
intro:
 - title: Title for intro 1
   text: Description for intro 1
   image: URL Image or CDN for intro image 1
 - title: Title for intro 2
   text: Description for intro 2
   image: URL Image or CDN for intro image 2
 - title: Title for intro 3
   text: Description for intro 3
   image: URL Image or CDN for intro image 3
output:
Widget Post Display
For the number of display widget post settings
services_show: 4 # Change number for services post display
blog_show: 6 # Change number for blog post display
output:
-----
ABOUT PAGE
To update your about area - open the about.md file - then change the frontmatter to your needs.
Header area
For change and update intro area
title: Title about page here....
description: Descirption about page here....
image: URL Image or CDN about page...
output:
Intro area
For change and update intro area
intro:
 image1: CDN or URL image for intro 1
 title1: Title for for intro 1
 text1:
  - Text for intro 1
  - Add new text for intro 2 like this
 image2: CDN or URL image for intro 2
 title2: Title for for intro 2
 text2:
  - Text for intro 2
  - Add new text for intro 2 like this
output intro1:
output intro2:
About Complete Frontmatter
Implementation example frontmatter about page
title: About Cuber Web Developer
description : Website develoepr services - Jekyll , Eleventy , Astro Js, React , Next Js , Gatsby Js, Svelte, Bludit, Pico , Flatifle Headless CMS
image: /assets/img/about/aboutwebsitedeveloper.webp
intro:
 image1: /assets/img/about/websitepeform.jpg
 title1: Website Performance Stability
 text1:
  - We always develop all our projects, both website development services and template theme creation with the principles of stability and performance, for better SEO support for users.
  - The stability of a site will certainly help optimize the performance of your site, for visitor comfort and SEO needs, That's why we provide the best level of stability for the perfection of your project.
 image2: /assets/img/about/websitespeed.jpg
 title2: Optimization for Speed
 text2:
  - With algorithm updates from Google, apart from quality article content, it also supports the speed of a site, and Google prioritizes websites with perfect performance, both in terms of speed, stability and performance. So it is not surprising that currently many developers are thinking about the theme structure with the best speed in developing a project.
  - And our website development team always provides the best results for performance and speed needs, both in building websites and for the themes we provide.
output:
-----
SERVICES PAGE
To update your services page area.
Services List
Setup servies list page - folder location services. Open services/index.html and change title, description for update your services list page.
frontmatter
title: Services list title here...
description: Description Services list here...
image: URL or CDN image cover services page
output:
Services Content
To create a new or update your service article, the location of the _services folder, Open the _services folder and create a new markdown file, for simple steps you can copy and paste from the example article, rename files with your url link , then change the front matter and article content according to your needs.
For YouTube videos, we just need to copy the backend link URL. An example of a full Youtube URL is https://youtube.com/watch/99ScGtlgjc4 , so we just need to copy this code 99ScGtlgjc4 and paste it into the video frontmatter.
Example :
files name jekyll-web-developer.md
Frontmatter
---
layout: services # Do not change
title: This is your services title...
description: This is your services description...
image: URL or CDN image here.....
button: Button text here...
link: Link for button , you can use for download or buy now direct to your paypall, gumroad, fiverr, and others.
video: Insert URL Youtube video here.. For YouTube videos, we just need to copy the backend link URL.
---
Write article in here...
Implementation
---
layout: services
title: Jekyll Web Dev Services
description: Jekyll website and themes template developer for help your website and blog project.
image: /assets/img/services/jekyllwebdeveloper.jpg
button: Order Jekyll Services
link: https://www.fiverr.com/creativitas/design-your-modern-website-using-jekyll
video: 99ScGtlgjc4
---
Jekyll is a static site generator that is very popular in the world of web development. running on ruby on rails, making websites faster with a very slim size, reliable performance, [Jekyll](https://www.jekyllrb.com) is the best solution for developing your website and blog projects.
The advantage of using Jekyll to develop websites is that it is very easy to deploy to various hosting sites, including [GitHub](https://github.com) pages which are famous for their speed, so building your site with Jekyll will be perfect with the best performance , speed , and SEO needs.
Output :
-----
GALLERY PAGE
To update your services page area.
Gallery List
Setup Gallery list page - folder location gallery. Open gallery/index.html and change title, description for update your services list page.
frontmatter
title: Gallery list title here...
description: Description Gallery list here...
image: URL or CDN image cover Gallery page
output:
Gallery Content
To create a new or update your gallery or project article, the location of the _galleries folder, Open the _galleries folder and create a new markdown file, for simple steps you can copy and paste from the example article, rename files with your url link , then change the front matter and article content according to your needs.
Note : slug is for id galleries , do not use this is my galleries but use this thisismygalleries or this-is-my-galleries
Example :
files name blacks.md
Frontmatter
---
slug: titleslughere..
title: This is your services title...
description: This is your services description...
image: URL or CDN image here.....
button: Button text here...
link: Link for button , you can use for download or buy now direct to your paypall, gumroad, fiverr, and others.
---
Write article in here...
Implementation
---
slug: astromultipuprose
title: Astro Js Blacks Multipurpose Themes
description: Multipurpose theme template for your website and blog, full features built with astro js
image: /assets/img/project/multipurpose-website.jpg
button: Download
link: https://creativitaz.gumroad.com/l/astrojs-blacks
---
Blacks is a complete set to help you develop modern websites with Astro js, Functional Tags, Home Page with slider image, About Page, Gallery Page, Image Gallery, Image details, Video Gallery, Video details, Blog page, blog details, Contact page and others.
Get started now, create your modern site with the Astro Js Blacks Multipurpose website theme template.
Output :
-----
CONTACT PAGE
To update your contact area - open the contact.md file - then change the frontmatter to your needs.
To use the contact form you need to register at https://formspree.io - then you can create a new form - give your form a name. Next, you can click the send menu - copy the endpoint to formspree_id in frontmatter
frontmatter
---
layout: contact # don't change
title: Title for your contact page...
description : Description for contact page...
image: Cdn URL image for contact page...
formspree_id: Copy endpoint formspree.io here...
contact:
 address: Your address here...
 map: Copy Google Map Link...
 phone: Input phone number..
 email: your email in here...
---
implementation
---
layout: contact
title: Contact Us
description : Website developer services - Jekyll , Eleventy , Astro Js, React , Next Js , Gatsby Js, Svelte, Bludit, Pico , Flatifle Headless CMS
image: /assets/img/contactwebsitethemestemplatedeveloper.webp
formspree_id: https://formspree.io/f/xjvqkgrr
contact:
 address: Hollywood 77th , Presemouth Pensilva - Desavaldora - USA
 map: https://maps.app.goo.gl/xBx8tKZ86wDLkUKs7
 phone: +1899998999
 email: axcora@gmail.com
---
output:
-----
AUTHOR PAGE
To update your author page.
Author List
Setup Author list page - folder location authors. Open authors/index.html and change title, description for update your author list page.
frontmatter
title: Authorlist title here...
description: Description Author list here...
image: URL or CDN image cover Author page
output:
Author Page
To create a new or update your author team, the location of the _author folder, Open the _author folder and create a new markdown file , for simple steps you can copy and paste from the example article, rename files with your url link , then change the front matter and article content according to your needs.
example file name : evgein-devjloc.md
Frontmatter
---
layout: author # Do not change
name: shortname for blog post
title: Full Author Name...
description: Description about the author
image: URL or CDN author image...
social:
 facebook: social author link
 twitter:
 instagram:
 twitter:
 linked:
 youtube:
 pinterest:
 github:
 discord:
 figma:
 dribbble:
---
Write about author here....
Implementation
---
layout: author # Do not change
name: evgein
title: Evgein Devjloc
description: Modern website developer JAMSTACK Static Site Generator , Astro Js, Jekyll , Eleventy 11ty, Gatsby Js, Next Js
image: /assets/img/author.jpg
social:
 facebook: https://creativitas.vercel.app
 twitter: https://creativitas.web.app
 instagram: https://creativitas.netlify.app
 twitter: https://creativitas.github.io
 linked: https://creativitas.pages.dev
 youtube: https://fiverr.com/creativitas
 pinterest: https://www.hockeycomputindo.com/themes
 github: https://www.hockeycomputindo.com/themes
 discord: https://www.hockeycomputindo.com/themes
 figma: https://www.hockeycomputindo.com/themes
 dribbble: https://www.hockeycomputindo.com/themes
---
Hello , I'm Evgein Devjloc
And i realy love with modern website development technology, such as JAMSTACK website .
I have experience in developing websites for my customers throughout the world, with various technologies to create websites information ,
company profiles, blogs , documentation website, portfolio , image gallery and so on.
output:
-----
BLOG PAGE
To update areas of your blog page. Make sure you have an author, you can create an author in the _author folder
Blog List
Setup Blog list page - folder location blog. Open blog/index.html and change title, description for update your blog list page.
frontmatter
title: Blog list title here...
description: Description Blog list here...
image: URL or CDN image cover Blog page
output:
Blog Post Content
To create a new or update your blog post article, the location of the _posts folder, Open the _posts folder and create a new markdown file with format years-month-date-title.md, for simple steps you can copy and paste from the example article, rename files with your url link , then change the front matter and article content according to your needs.
Note: Make sure you have an author, you can create an author in the _author folder m then you can insert author name on author frontmatter.
Example :
files name 2024-02-04-why-jekyll.md
Frontmatter
layout: post # Don't change
title: Title for blog post...
description: Description for blog post...
image: CDN or URL Image Cover..
date: Publish date here...
author: your author name..
categories: your categories here....
tags:
 - tag1
 - tag2
---
write article in this area....
Implementation
---
layout: post # Don't change
title: Jekyll themes Template
description: Free Download and Open Source Code Jekyll Website Themes Template for your website and blog project.
image: /assets/img/blog/newjekyllthemestemplate.webp
date: 2024-02-04
author: evgein
categories: fastweb
tags:
 - jekyll
 - ssg
 - jamstack
 - source code
 - free
 - template
 - themes
---
If you want to develop your site or need to learn how to build your site with jekyll, then you can download this source code project to help you learn how to develop a modern JAMSTACK Static Site Generator with Jekyll.
Jekyll] is very easy to develop to support building sites with various needs, such as company profiles, schools, cafe restaurants, portfolios, and others.
Ease of use of YAML files, markdown, frontformatter helps you build sites faster and without coding.
Output :
-----
SEO SCRIPT
SEO INJECTION SCRIPT
Equipped with automatic SEO injection scripts, makes it easy for you to just focus on the content of your articles.
Meta tag , Open Graph, Google LD JSON, and more..
-----
GITHUB PUSH
Register and create account on github , next you can create new repo , Name it your repo , then select your project for public or private, Then you can click create repo button.
Next, You need to following github command.
For first access your project using terminal , then copy and paste command script from github.
Example
git init
git add .
git commit -m "first commit for my astro website"
git remote add origin https://github.com/username/your-repo-name
git push -u origin master
Change username with your github username ,and change your-repo-name with your github repo
And you have successfully push your project on github repo.
Output
Next step, you need to register on modern static host provider for deploy your project and make your website live.
-----
HOSTING DEPLOY
- For deploy and make your website live, so you need to register on modern static host provider, for example, cloudflare , netlify or vercel.
- Register with your github account
- Next you can click create new project app for netlify and vercel or pages for cloudflare
- And you can click select and integration with your github repo project.
- After you have integration with your github account, now you can select yout github repo
- Next you can click deploy, and select jekyll as framework.
- Click Deploy
- Congratulations your website is live now !!
-----
HEADLESS CMS
To update your about area - open the about.md file - then change the frontmatter to your needs.
If you want to work with CMS , so you can use headless git cms for best solutions.
Same like other cms, with headless cms we can update website and blog quickly.
Include with credential security for login on backend admin, make your website secure.
For simple and quick CMS you can try prose.io - open prose.io and integration with your github repo, next you can edit and update your site via prose.io
CLOUD HEADLESS CMS
We can use netlify decap cms. Credential login with google or github account , with Admin Dashboard area - You can build your backend headless cms with decap cms.
HEADLESS CMS LOCAL
Or you can use headless cms for your dev local mode with Tina CMS
If you interest work with headless cms, so you can use our services for develope your backend headless cms admin for your project.
Order Headless CMS integration
-----
BONUS SEO TIPS
If you want your site powerfull in SEO, we need to register with Google Search Console, register your site by adding a site and entering the domain URL, then open settings and download the Google HTML tag, then upload it to your web project, and add Google Meta. html in the theme head code, then add the DNS record from Google to your site.
After that, we can access the site map, and enter sitemap.xml and feed.xml so that your articles can be indexed quickly by Google.
-----
THANK YOU
Thank You by Using Cubber Jekyll Theme.
And thanks alot for use cubber jekyll template, we hope this project can help you build modern web blog with SEO.
URL: https://www.hockeycomputindo.com/themes/jekyll/new-jekyll-themes-template-cubber/
Embed — Cloudinary
New Jekyll Themes Template - Cubber Project
https://www.hockeycomputindo.com/themes/jekyll/new-jekyll-themes-template-cubber/
DOWNLOAD →Own 100%
New Jekyll Themes Template - Cubber ProjectModern Unique Elegant Futuristic Jekyll Theme Template - Cuber - Multipurpose Themes - SEO Jekyll Support for your website and blog project.
DOWNLOAD →DEMO →Features
jamstack
ruby
jekyll
github
easy-installation
page-article
about-page
services-page
blog-article
gallery-page
author-page
contact-form
categories-and-tags
pagination-blog
yaml-data
markdown-content
previous-next-post
documentation-ready
full-source-code-themes-template-project
modern-host-support-netlify-vercel-cloudflare-and-others
build-production-host-firebase-surge-cpanel-vps-direct-admin-plesk-and-others
← Jekyll Redirect Link Source Code FreeThe Book Jekyll Themes Free Download →
Need Custom?
Hire via Fiverr Escrow
72+ verified reviews, escrow protected.
ORDER CUSTOM →Selected Themes
A focused collection, not a marketplace.

Custom Web Architecture
Escrow Protected
Headless Commerce, Booking OS, SSG & Vision AI - Custom built for your business - Commerce, Booking, SSG, AI - Built to own, not rented.
Own 100% .NET Engine - 12ms Build No Lock
Slow builds & rented platform? DAX .NET 8 static builder - 12ms compile, zero bloat, single binary, immutable infra you control forever. Own source, not subscription.
Order Now -> 02 — AI AutomationForensic Self-Hosted AI - Vision Finance & Autoblog
Stop giving data to cloud. SAEDI Vision runs on your infra - forensic audit trail, vision intelligence, finance automation, 100% auditable. Own pipeline & data.
Order Now -> 03 — Static Site GeneratorPython-First SSG - No Ruby Node Headache
Sick of gem & npm conflicts? Pycora is Python-native - own your pipeline, no dependency hell, no Jekyll, no Astro, just clean Python build.
Order Now ->