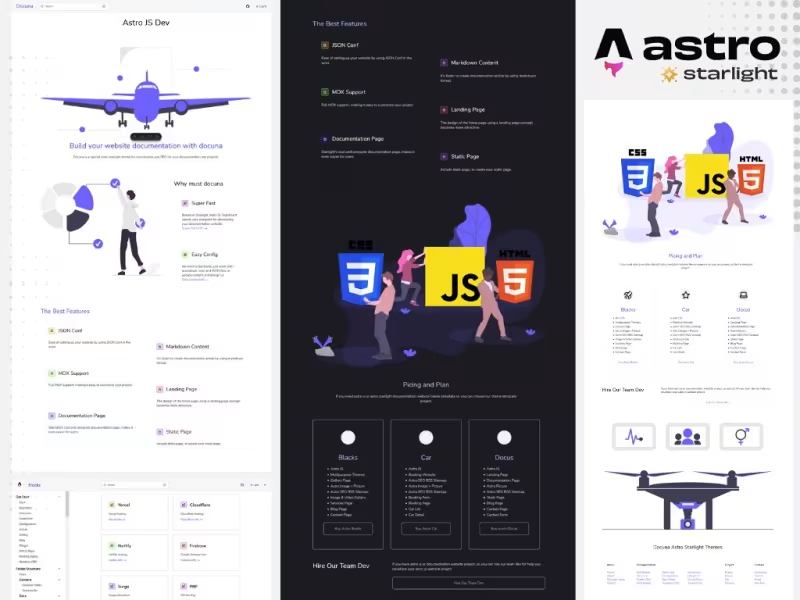
Docuna a landing page starlight project
Starlight Docuna landing page themes template for your documentation website project.
How To
1
Download or Order Template
2
Read Documentation Project
3
Run Project on your website
themestemplate website themes website template documentation themes documentation template astro template astrothemes jamstackthemes premiumthemes
Docuna a landing page starlight project Content Docs
Docuna Astro Starlight project .
A project present by creativitas
Hire developer : https://www.fiverr.com/users/creativitas
How to install docuna starlight astro js themes template .
Download Node JS .
For first you need to download and install node js , so you can download node js
Download and install node js on your local devices.
Download Docuna Project .
Next you can download docuna source code project, you can download docuna here
Extract Docuna Project .
After you have download and install node js , and download docuna source code project, next you can create new folder on desktop, name it your new folder with docuna , and extract docuna source code project in to your project folder / docuna folder.
Install Docuna Project .
Ok, now you can access docuna project on your desktop with terminal, so open terminal, and run command cd/C:\Users\pcname\Desktop\docuna.
Need to change pcname with your pc name , now you can install docuna project by run this command npm install
Run Docuna Project .
Ok, now we can run docuna project on your local devices, so run this command npm run dev , open localhost:4321
Congratulations, you have run docuna project on your local devices.
Configuration .
First you need to set up and configure your documentation site, make sure you have a list of content about your documentation project.
And then you can configure your sidebar site in astro.config.mjs
Open astro.config.mjs with code editor
Add your domain .
Insert your domain
title: 'Your doc title here....',Configure sidebar .
Configure sidebar doc page
label: 'Your categories doc here...',Documentation content .
Configure your documentation content
items: [
{ label: 'Your content doc title...', link: 'URL Link for your documentation content article..' },
Auto Generate .
Use auto generate content from documentation folder
{
label: 'Your Categories doc here...',
autogenerate: { directory: 'your folder doc here...' },
},
Example Code .
Complete code look like this
export default defineConfig({
  site: 'your website domain here..',
  integrations: [
    starlight({
      title: 'Your doc title here....',
      social: {
        github: 'your github repo url here..',
      },
      sidebar: [
        {
          label: 'Your categories doc here...',
          items: [
            { label: 'Installation', link: '/getstart/installation/' },
            { label: 'Your content doc here..', link: 'URL Link content doc here..' },
          ],
        },
        {
          label: 'Your Categories doc here...',
          autogenerate: { directory: 'your folder doc here...' },
        },
        {
          label: 'Project',
          autogenerate: { directory: 'project' },
        },
      ],
    }),
  ],
});
Implementation Code .
example implementation code
export default defineConfig({
  site: 'https://astrodoc.pages.dev',
  integrations: [
    starlight({
      title: 'Docuna',
      social: {
        github: 'https://www.fiverr.com/creativitas',
      },
      sidebar: [
        {
          label: 'Getting Started',
          items: [
            { label: 'Welcome', link: '/getting-started/welcome/' },
            { label: 'Download', link: '/getting-started/download/' },
            { label: 'Installation', link: '/getting-started/installation/' },
            { label: 'Structure', link: '/getting-started/structure/' },
            { label: 'Configuration', link: '/getting-started/configuration/' },
            { label: 'Design UI', link: '/getting-started/design/' },
            { label: 'Content Doc', link: '/getting-started/content/' },
            { label: 'Static Page', link: '/getting-started/static-page/' },
            { label: 'Hosting Deploy', link: '/getting-started/hosting-deploy/' },
            { label: 'Headless CMS', link: '/getting-started/headlesscms/' },
          ],
        },
        {
          label: 'Source Code',
          autogenerate: { directory: 'sourcecode' },
        },
        {
          label: 'Project',
          autogenerate: { directory: 'project' },
        },
      ],
    }),
  ],
});
How to update landing page starlight astro js project .
For update design landing page UI, and configure your navbar or footer , you can access on src/data/
Navbar Link .
For update navbar menu link and footer area, you can access on src/data/config/config.json
{
  "title": "Your website title...",
  "description": "Your website description here...",
  "image": "insert url cdn for Footer image menu here...",
  "nav1_title": Name or title for menu nav 1 here...",
  "nav1": [
    {
      "nav": "Name or title for menu nav1 list here...",
      "link": "URL Link for menu list 1 here..."
    },
    {
      "nav": "Name or title for menu nav list here...",
      "link": "URL Link for menu list here..."
    },
    {
      "nav": "Add your menu for nav list here..",
      "link": "URL Link for menu here..."
    }
  ],
// example implementation for menu nav 2
  "nav2_title": "Documentation",
  "nav2": [
    {
      "nav": "Content Doc",
      "link": "/"
    }
    {
      "nav": "Source Code",
      "link": "/"
    }
  ],
// example implementation for menu nav 3
  "nav3_title": "Project",
  "nav3": [
    {
      "nav": "Blacks",
      "link": "/src/assets/fg.svg"
    },
    {
      "nav": "Docus",
      "link": "/src/assets/fg.svg"
    }
  ]
}
implementation
{
  "title": "Docuna Astro Starlight Themes",
  "description": "Develope your modern website with astro js",
  "image": "/img/ft1.svg",
  "nav1_title": "Menu",
  "nav1": [
    {
      "nav": "Home",
      "link": "/"
    },
    {
      "nav": "About",
      "link": "/about"
    },
    {
      "nav": "Documentation",
      "link": "/start"
    },
    {
      "nav": "Contact",
      "link": "/contact"
    }
  ],
  "nav2_title": "Documentation",
  "nav2": [
    {
      "nav": "Get Started",
      "link": "/getting-started/"
    },
    {
      "nav": "Download",
      "link": "/"
    },
    {
      "nav": "Installation",
      "link": "/"
    },
    {
      "nav": "Structure",
      "link": "/"
    },
    {
      "nav": "Configuration",
      "link": "/"
    },
    {
      "nav": "Design UI",
      "link": "/"
    },
    {
      "nav": "Content Doc",
      "link": "/"
    },
    {
      "nav": "Static Page",
      "link": "/"
    },
    {
      "nav": "Host Deploy",
      "link": "/"
    },
    {
      "nav": "Headless CMS",
      "link": "/"
    },
    {
      "nav": "Source Code",
      "link": "/"
    }
  ],
  "nav3_title": "Project",
  "nav3": [
    {
      "nav": "Blacks",
      "link": "/src/assets/fg.svg"
    },
    {
      "nav": "Docus",
      "link": "/src/assets/fg.svg"
    },
    {
      "nav": "Car",
      "link": "/src/assets/fg.svg"
    },
    {
      "nav": "Docuna",
      "link": "/src/assets/fg.svg"
    }
  ],
  "nav4_title": "Contact",
  "nav4": [
    {
      "nav": "Whatsapp",
      "link": "https://wa.me/6285179858615"
    },
    {
      "nav": "Call Us",
      "link": "tel:+6285179858615"
    },
    {
      "nav": "Email",
      "link": "mailto:axcora@gmail.com"
    },
    {
      "nav": "Hire Dev",
      "link": "https://www.fiverr.com/creativitas"
    }
  ]
}
Home Landing Page .
For update home landing page design ,you can access on src/data/home/home.json
You can update the landing page design in this area, just edit it according to your needs with json code. Adjust it to the part you want to edit.
For change icon you can see starlight component https://starlight.astro.build/guides/components/#icon
{
    "intro": {
        "title": "Title for intro area here...",
        "text": "Description for intro area here....",
        "image": "URL image or CDN intro area in here..."
    },
    "why": {
        "title": "Why area title here...",
        "image": "URL CDN why area image here..."
    },
    "why_list": [
        {
            "title": "Insert your title list1 here...",
            "text": "Text information about list1 here...",
            "icon": "Insert icon starlight here...",
            "link": "Link for this list area.."
        },
        {
            "title": "New list title here...",
            "text": "Nex text info here...",
            "icon": "INsert icon starlight here..",
            "link": "link for this list.."
        }
    ],
    "features": "Title for features area...",
    "feature_list": [
        {
            "title": "Features title 1 here...",
            "text": "Text information about title 1 here...",
            "icon": "icon starlight here...",
            "link": "Link url for this features list.."
        },
        {
            "title": "Markdown Content",
            "text": "It's faster to create documentation article by using markdown format.",
            "icon": "star",
            "link": "/getstart/markdown"
        }
    ],
    "pricing": {
        "title": "Title for pricing area here...",
        "cover": "insert url or cdn image for pricing area..",
        "text": "Text information about pricing area..."
    },
    "plan": [
        {
            "title": "Pricing plan 1 title here...",
            "icon": "icon from starlight here..",
            "price": "Input price for this pricing plan..",
            "link": "URL Link for order this plan...",
            "features": [
                {
                    "text": "Insert features text list here.."
                },
                {
                    "text": "Insert new features text list here.."
                }
            ]
        },
        {
            "title": "Pricing plan 2 title here...",
            "icon": "icon from starlight here..",
            "price": "Input price for this pricing plan..",
            "link": "URL Link for order this plan...",
            "features": [
                {
                    "text": "Insert features text list here.."
                },
                {
                    "text": "Insert new features text list here.."
                }
            ]
        },
    ],
    "section": {
        "title": "Title for section area...",
        "text": "Text information for section area...",
        "link": "Link url for section area here..."
    }
}
Implementation
{
    "intro": {
        "title": "Build your website documentation with docuna",
        "text": "Docuna is a special astro starlight theme for fast creation and SEO for your documentation site projects.",
        "image": "/img/pesawat.svg"
    },
    "why": {
        "title": "Why must docuna",
        "image": "/img/report.svg"
    },
    "why_list": [
        {
            "title": "Super Fast",
            "text": "Based on Starlight Astro JS. Significant speed, very complete for developing your documentation website.",
            "icon": "rocket",
            "link": "/"
        },
        {
            "title": "Easy Config",
            "text": "No need to hardcode, just work with markdown, mdx and JSON files to update content and design UI.",
            "icon": "setting",
            "link": "/"
        }
    ],
    "features": "The Best Features",
    "feature_list": [
        {
            "title": "JSON Conf",
            "text": "Ease of setting up your website by using JSON Conf.in the work.",
            "icon": "star",
            "link": "/"
        },
        {
            "title": "Markdown Content",
            "text": "It's faster to create documentation article by using markdown format.",
            "icon": "star",
            "link": "/"
        },
        {
            "title": "MDX Support",
            "text": "Full MDX support, making it easy to customize your project.",
            "icon": "star",
            "link": "/"
        }
    ],
    "pricing": {
        "title": "Picing and Plan",
        "cover": "/img/ssg.svg",
        "text": "If you need astro js or astro starlight documentation website theme template so you can choose our theme template project."
    },
    "plan": [
        {
            "title": "Blacks",
            "icon": "rocket",
            "price": "$65",
            "link": "https://creativitaz.gumroad.com/l/astrojs-blacks",
            "features": [
                {
                    "text": "Astro JS"
                },
                {
                    "text": "Multipurpose Themes"
                }
            ]
        },
        {
            "title": "Car",
            "icon": "star",
            "price": "$65",
            "link": "https://creativitaz.gumroad.com/l/astro-js-car",
            "features": [
                {
                    "text": "Astro JS"
                },
                {
                    "text": "Booking Website"
                },
                {
                    "text": "Astro SEO RSS Sitemap"
                }
            ]
        }
    ],
    "section": {
        "title": "Hire Our Team Dev",
        "text": "If you have astro js or documentation website project, so you can hire our team dev for help you develope your astro js website project.",
        "link": "https://www.fiverr.com/creativitas/design-modern-documentation-website-astro-js-stalight"
    }
}
You can see how to implement it in the code, examples in the source code.
How to write documentation contet article .
Folder Location .
For write content documentation, you can access on src/content/docs
Categories Group .
Now you can create category folders to group your documentation content articles.
for example the getstart folder for how to work with your project.
Content Article .
Next, you can create a content article, by creating a new .md markdown file, in the getstart folder.
Example Content .
Example we create installation.md for create installation documentation content , next you can add this frontmatter,
---
title: Your title in here...
description: Description in here....
---
Write content with markdown concept here....
You can create new folder and name it with your documentation categories for grouping your documentation content. and create .md fiels for write documentation content .
How to create static page documentation starlight docuna .
Learn how we can build static production for deploy on your hosting.
Folder Location
For create a new static page you can access on src/content/docs
Create New Page
And create your new static page with mdx format, for example about.mdx for create your about page.
Frontmatter Next you can insert this frontmatter in to your about.mdx or your new static page. You just need to edit and update title, description,image cover, then write your content article.
title: "Insert title here...."
description: "Insert description here...."
image: "Insert URL image cover here..."
---
title: "Insert title here...."
description: "Insert description here...."
image: "Insert URL image cover here..."
template: splash
---
import { Card, CardGrid } from '@astrojs/starlight/components';
import { Picture } from 'astro:assets';
import Conf from '../../data/config/config.json';
import Footer from '../../widget/Footer.astro';
import Header from '../../widget/Header.astro';
import '../../styles/doc.css';
import '../../styles/deja.css';

<div class="container-fluid">
<div class="row">
<div class="col-md-10 mx-auto p-3">
  <Picture
    src={frontmatter.image}
    alt={Conf.description}
    formats={['avif', 'webp']}
    sizes={`(max-width: 360px) 240px, (max-width: 720px) 540px, (max-width: 1600px) 720px`}
    width="1200"
    height="400"
    class="img-fluid"
    decoding="async"
  />
<h2><strong><a href="/about">{frontmatter.description}</a></strong></h2>


Write your article in here.....


</div>
</div>
</div>
<Footer/>
Example .
Implementation static page
---
title: "About Docuna"
description: "A modern documentation website themes template base on Astro JS"
image: "/img/ssg.svg"
template: splash
---
import { Card, CardGrid } from '@astrojs/starlight/components';
import { Picture } from 'astro:assets';
import Conf from '../../data/config/config.json';
import Footer from '../../widget/Footer.astro';
import Header from '../../widget/Header.astro';
import '../../styles/doc.css';
import '../../styles/deja.css';

<div class="container-fluid">
<div class="row">
<div class="col-md-10 mx-auto p-3">
  <Picture
    src={frontmatter.image}
    alt={Conf.description}
    formats={['avif', 'webp']}
    sizes={`(max-width: 360px) 240px, (max-width: 720px) 540px, (max-width: 1600px) 720px`}
    width="1200"
    height="400"
    class="img-fluid"
    decoding="async"
  />
<h2><strong><a href="/about">{frontmatter.description}</a></strong></h2>

Docuna is a simple and modern themes template for starlight [astro js](https://astro.build/) project.

Very easy to use for develope your documentation site project.

Based on [starlight](https://starlight.astro.build/) and with a landing page concept on the main display, provides complete information for users, with static pages make it easier for you to provide other information such as about pages, contacts and so on.

</div>
</div>
</div>
<Footer/>
Hosting Deploy .
For deploy your documentation website project, for first you need push your documentation website project in to github repo, just create github account and create new repo, then push your project in to your repo.
Next you can register on cloud modern hosting like netlify, vercel, cloudflare and others.
Visit modern host, register and create new account with your github account, create new project and integration with your github repo project, then click deploy.
Next you need to configure your custom domain in to your project. Just change your domain name server with modern cloud hosting name server netlify , vercel or cloudflare, you can read documentation from provider hosting doc page.
Headless CMS .
Decap CMS .
You can use decap cms by netlify app for integration your project with decap cms, and you can also deploy your website on netlify.
Tina CMS .
Tina is the best choice if you want integration your documentation website project, for dev mode or localdevices.
Cloudcannon .
You can also integration your website project with cloudcannon headless cms if you want to work with cms.
Others .
There are many Headless CMS that you can use for integration with your projects.
Headless CMS Services .
If you want you can use our services , for integration your astro starlight project with headless cms. Hire our team now.

Astro Js Blog website themes template

UPDATE NEW THEMES TEMPLATE
Select your favorite technology and website blog themes template


