GAX Pro — Premium Go Static Site Generator Theme | Hugo Alternative
Premium Go static site generator theme and Hugo alternative. SEO defaults, Decap CMS, iSimple Docs, auto collections, zero node_modules. One-time $155, unlimited sites.
themestemplate • website-themes • website-template • hugo-alternative • golang • themes • template • go • golangthemes • gothemes • freethemes • premiumthemes •
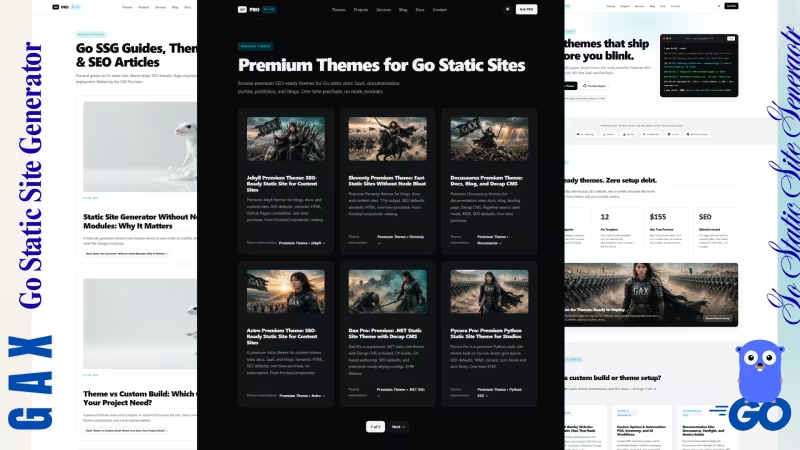
Table Of Content
- GAX Pro: Premium Go Static Site Generator Theme and Hugo Alternative
- Why Teams Choose GAX Pro Over Other Go Themes
- One Binary, Zero Node Modules
- Built for SaaS Docs, Not Just Blogs
- Why GAX Pro Is the Hugo Alternative for Go Developers
- Buy GAX Pro
- Complete Documentation
- What You Need Before You Start
- Step 1: Download the Source Code
- Step 2: Installation
- Step 3: Run the Project
- Step 4: Run the Project with Decap CMS
- Step 5: All Documentation with Decap CMS and Code
- Article body starts here
GAX Pro — Premium Go Static Site Generator Theme | Hugo Alternative
GAX Pro: Premium Go Static Site Generator Theme and Hugo Alternative
GAX Pro is a premium Go static site generator theme built for developers and teams who want a fast, SEO-ready site without the node_modules dependency chain. It is a Hugo alternative for teams that want familiar templates, YAML frontmatter, and auto collections — without the heavy Go template syntax.
If you have used Hugo, 11ty, or Jekyll, the workflow will feel familiar. If you have used Hugo specifically and found the Go template syntax heavy, GAX Pro is the lighter path: same speed, simpler templates, ready-made Go themes.
Why Teams Choose GAX Pro Over Other Go Themes
GAX Pro is not just an engine. It ships with premium Go themes built for real sites, not demo screenshots. Every theme includes full layouts, SEO defaults, and a content structure that works from day one.
- SaaS and Startup theme — landing page, pricing table, changelog, and blog layouts for product sites.
- Documentation theme — docs, guides, API reference structure with sidebar navigation and search.
- Portfolio and Agency theme — project showcase, services, about, and contact layouts.
- Blog and Publication theme — article layouts, tag pages, pagination, and RSS feed.
Every theme includes title tags, meta descriptions, canonical URLs, Open Graph tags, sitemap.xml, and RSS feed. You do not configure SEO from scratch — it is already in the theme.
One Binary, Zero Node Modules
One Go binary, zero node_modules, zero lockfile archaeology. Install with one command. Build in Docker from scratch. Deploy the site output anywhere static files live.
There is no dependency chain to maintain, no plugin updates to schedule, and no security patching cycle. The build works the same on every machine.
Built for SaaS Docs, Not Just Blogs
Marketing site, docs portal, changelog, pricing page, and blog. One binary, one content model, one deploy. Drop Markdown into content/blog/, content/projects/, or content/services/ and GAX builds the collection, the tag index, and the detail pages automatically.
That means you can run a product site, a documentation portal, and a blog from the same project. No separate CMS per section. No syncing between tools.
Why GAX Pro Is the Hugo Alternative for Go Developers
Hugo is fast, mature, and has a large theme ecosystem. GAX Pro does not try to replace Hugo for every project. It is a lighter path for teams that want:
- Simpler templates —
.gaxlayouts are closer to Liquid and Jekyll than to Go template pipelines. - Pre-built Go themes — pick a theme, add content, deploy. No theme assembly from scratch.
- SEO defaults included — no plugin, no manual meta wiring per page.
- Decap CMS ready — browser-based editing for non-technical editors.
- Zero node_modules — one binary, no dependency chain.
If your project needs complex taxonomy, shortcodes, or custom content types, Hugo remains the stronger choice. If you want a finished theme with SEO defaults and a simpler template layer, GAX Pro is built for that.
Buy GAX Pro
GAX Pro is a $155 one-time purchase on Gumroad. One payment, unlimited sites, commercial use included. No subscription, no recurring fee.
Browse the full theme catalog at hockeycomputindo.com.
Get GAX Pro on Gumroad — $155 one-time
Complete Documentation
This guide walks you through GAX Pro from zero to a deployed site. It is written for two kinds of readers: users who have never built a static site before, and developers who want the technical details. Every step is explained in order. If you follow it from top to bottom, you will end with a live site.
What You Need Before You Start
Before you begin, make sure you have these on your computer:
- Go 1.26 or newer — the build runtime. Free download from go.dev/dl.
- A text editor — VS Code, Sublime Text, or any editor that handles Markdown files. Notepad works, but VS Code is easier.
- A terminal — Command Prompt or PowerShell on Windows, Terminal on macOS and Linux.
- A GitHub account — free at github.com. You will need this for deployment.
- A hosting account — Netlify, Vercel, Cloudflare Pages, or a VPS. Netlify is recommended for Decap CMS.
You do not need Node.js, npm, Python, Ruby, or a database. Go is the only build dependency.
A note on the terminal
The terminal is a text window where you type commands. On Windows, open Command Prompt from the Start menu, or PowerShell if you prefer. On macOS, open Terminal from Applications > Utilities. On Linux, open your terminal app.
Every command in this guide is typed into the terminal, then you press Enter to run it. Commands are shown in a box like this:
go version
Copy the command, paste it into the terminal, press Enter.
Step 1: Download the Source Code
After you buy GAX Pro on Gumroad, you receive a download link by email. You can also log in to your Gumroad library to re-download at any time.
Download the ZIP file
- Open the Gumroad download link from your email, or log in to Gumroad and go to your library.
- Download the GAX Pro ZIP file.
- Note the folder where the ZIP was saved — usually your Downloads folder.
Extract the ZIP
On Windows:
- Right-click the ZIP file.
- Select Extract All.
- Choose a destination folder — for example,
C:\Users\YourName\Desktop\gaxpro. - Click Extract.
On macOS:
- Double-click the ZIP file. It extracts to the same folder.
On Linux:
- Right-click the ZIP file and select Extract Here, or run in a terminal:
unzip gaxpro.zip -d gaxpro
After extraction, you should have a folder with these files and directories inside:
content/— all pages, blog, services, projects, docstemplates/— layouts and partialspublic/— CSS, JS, images, Decap CMS admin_data/— site configurationcmd/— the GAX build command sourcego.modandgo.sum— Go module filesREADME.md— quick start guideLICENSE— commercial license
If these files are present, the download is complete.
Step 2: Installation
This step installs Go and builds the GAX binary. It is done once.
Install Go
Windows:
- Go to go.dev/dl
- Download the Windows installer (
.msi) for the latest version. - Run the installer and follow the default prompts.
- Go installs to
C:\Program Files\Goand adds itself to your PATH automatically.
macOS:
- Go to go.dev/dl
- Download the macOS installer (
.pkg). - Run the installer and follow the default prompts.
Or, if you use Homebrew:
brew install go
Linux:
For Debian or Ubuntu:
sudo apt update
sudo apt install golang-go
For Fedora:
sudo dnf install golang
For Arch:
sudo pacman -S go
Or download the official binary from go.dev/dl and add Go to your PATH.
Verify the installation
Open a terminal and run:
go version
You should see something like go version go1.26.0 windows/amd64. If you see "command not found" or "not recognized", Go is not in your PATH. Reinstall using the official installer, or add the Go binary directory to your PATH manually.
Build the GAX binary
- Open a terminal.
- Go to the project folder:
cd path/to/gaxpro
On Windows, the path looks like:
cd C:\Users\YourName\Desktop\gaxpro
- Build the binary:
go build -o gax ./cmd/gax
On Windows, this creates gax.exe. On macOS and Linux, this creates gax. You only need to build once. After that, you run the binary directly.
Step 3: Run the Project
Development mode starts a local server with live reload. Every time you save a file, the browser refreshes.
- Open a terminal in the project folder.
- Run:
./gax
On Windows:
gax.exe
- Open your browser and go to:
http://localhost:8080
You should see the GAX Pro homepage. The server is now running.
What you see
The homepage shows the theme's landing page: hero section, features, pricing, FAQ, and call-to-action. This is the starter content that ships with the theme. You will edit this later.
Live reload
While the server is running, open any file in the content/ folder, make a change, and save it. The browser refreshes automatically. This is the development workflow.
Stop the server
Press Ctrl + C in the terminal to stop the server.
Step 4: Run the Project with Decap CMS
Decap CMS is a browser-based editing interface. It lets you edit content in a clean UI instead of editing Markdown files directly.
This step is optional. If you are comfortable editing Markdown files, skip to Step 5. If you want browser-based editing, follow this step.
What Decap CMS adds
- A clean editing interface at
http://localhost:8080/admin/ - Form fields for title, description, date, tags, and body
- No need to remember frontmatter syntax
- A preview of how the content will look
Open two terminals
Decap CMS needs two processes running at the same time:
- The GAX development server — serves the site at
http://localhost:8080 - The Decap CMS proxy — lets the CMS write files back to your local project
That is why you open two terminals: one for the site, one for the CMS proxy.
Terminal 1: Run the GAX project
cd path/to/gaxpro
./gax
On Windows:
cd C:\Users\YourName\Desktop\gaxpro
gax.exe
Leave this terminal running. The site is now live at http://localhost:8080.
Terminal 2: Run the Decap CMS proxy
Open a second terminal. Go into the same project folder:
cd path/to/gaxpro
Run the Decap CMS proxy:
npx decap-server
This requires Node.js. If you do not have Node.js, install it from nodejs.org. The proxy starts and listens for the CMS. Leave this terminal running too.
Open the CMS
With both terminals running, open:
http://localhost:8080/admin/
The Decap CMS login screen appears. Because you are running with the local backend, the login is automatic — the CMS checks that the local proxy is running and connects to it.
If the login fails:
- Check that
npx decap-serveris running in Terminal 2 - Check that
./gaxis running in Terminal 1 - Check that
local_backend: trueis set inpublic/admin/config.yml - Reload the page after both terminals are confirmed running
What you can edit in the CMS
Once logged in, the left sidebar shows the content types:
- Pages — homepage, about, contact, 404, tags
- Blog — blog articles
- Services — service pages
- Projects — project pages
- Docs — documentation pages
- Site Config — navigation, footer, brand, social links
Click a content type to see its entries. Click New to create a new entry, or click an existing entry to edit it.
Editing the homepage
The homepage is a single file at content/index.md. In the CMS, it appears under Pages > Homepage. The form shows the frontmatter fields as form inputs: hero title, lead text, primary button, and so on. Edit the fields, then click Save or Publish.
The CMS writes the changes back to content/index.md. The site rebuilds on the next request, and the browser shows the updated homepage after a refresh.
Adding a blog article
- Open Blog in the CMS sidebar
- Click New
- Fill in the frontmatter fields: title, description, date, tags, image
- Write the body in the Markdown editor
- Click Publish
The CMS creates a new Markdown file in content/blog/. GAX adds it to the collection on the next build.
Editing the site configuration
The _data/config.yaml file holds site-wide settings. In the CMS, it appears under Site Config. Edit the site title, navigation, footer, social links, and widgets. Save the file and the changes appear on every page.
Switching between CMS and text editor
Both workflows edit the same files. You can switch between them freely:
- Edit a file in the CMS, then open it in a text editor to see the same content
- Edit a file in a text editor, then reload the CMS to see the change
There is no lock-in. The CMS is a convenience layer over the Markdown files.
Decap CMS errors
CMS shows a blank screen — the local proxy is not running, or local_backend is not set. Check Terminal 2 and config.yml.
Login does not complete — the proxy is running but the CMS cannot reach it. Check that the port matches (default 8081 for the proxy, 8080 for the site).
Changes do not save — the proxy is not running, or the file path in config.yml is wrong.
New article does not appear — the CMS saved the file but GAX did not rebuild. Reload the site or restart ./gax.
Step 5: All Documentation with Decap CMS and Code
This step covers the full workflow: editing content with Decap CMS, and editing code (templates, configuration, CSS) with a text editor. Both are part of the same project.
Content editing (Decap CMS)
Use the CMS for:
- Homepage content (hero, features, pricing, FAQ, CTA)
- Static pages (about, contact, 404)
- Blog articles
- Service pages
- Project pages
- Docs pages
- Site configuration (navigation, footer, brand, widgets)
Content editing does not require touching code. The CMS writes Markdown and YAML files in content/ and _data/.
Code editing (text editor)
Use a text editor for:
- Templates (
templates/layouts/,templates/partials/) — if you want to change the layout structure, add sections, or modify the HTML output - CSS (
public/css/style.css) — if you want to change colors, typography, or spacing - JavaScript (
public/js/main.js,public/js/docs.js) — if you want to change interactivity - Images (
public/images/) — if you want to replace the starter images with your own - Go source (
cmd/gax/,internal/) — if you want to modify the engine itself
The workflow
- Edit content in the CMS, save, and reload the site
- Edit code in a text editor, save, and the site reloads (if the dev server is running)
- Run
./gax buildto generate the final static site - Deploy the
site/folder to your host
Content folder structure
content/
├── index.md              Homepage
├── about.md              About page
├── contact.md            Contact page
├── blog.md               Blog controller
├── docs.md               Docs controller
├── projects.md           Projects controller
├── services.md           Services controller
├── tags.md               Tags page
├── 404.md                Not-found page
├── blog/                 Blog articles
├── docs/                 Documentation pages
├── projects/             Project pages
└── services/             Service pages
Each Markdown file has two parts: frontmatter (YAML between --- markers) and body (Markdown).
Frontmatter example
---
layout: post
title: "My Article"
description: "A short description."
date: 2026-11-11
tags:
  - golang
  - ssg
canonical: "http://localhost:8080/blog/my-article/"
---
## Article body starts here
Body content
The body is standard Markdown: headings, lists, links, images, code blocks, tables, blockquotes. Everything below the --- separator renders as HTML.
Template editing example
If you want to change the footer text, open templates/partials/footer.gax. Find the text and change it. Save the file. The dev server reloads the page automatically.
CSS editing example
If you want to change the primary color, open public/css/style.css. Find the --brand-go variable and change the value. Save the file. The dev server reloads the page automatically.
Best practices
- Edit content in the CMS, not in a text editor, when possible
- Edit code in a text editor, not in the CMS
- Commit your changes to Git regularly
- Test locally before deploying
Step 6: Deploy to Production
This step covers the full deployment path: pushing to GitHub, connecting a host, and running the deploy. It also covers Decap CMS production setup.
Deploy prerequisites
- A GitHub account
- A hosting account (Netlify is recommended for Decap CMS)
- Git installed on your computer
Git is separate from Go. On Windows, install it from git-scm.com. On macOS, it comes with the Xcode Command Line Tools. On Linux, install it through your package manager.
Step 6.1: Create a GitHub repository
- Go to github.com and sign in (or sign up if you do not have an account)
- Click the + icon in the top right, then New repository
- Name the repository — for example,
gaxpro-site - Choose Private or Public
- Do not initialize with a README,
.gitignore, or license — the project already has files - Click Create repository
GitHub shows the commands to connect an existing folder to this repository. Keep that page open.
Step 6.2: Push the project to GitHub
- Open a terminal in the project folder:
cd path/to/gaxpro
- Initialize Git if the folder is not already a repository:
git init
- Add all files and commit:
git add .
git commit -m "Initial commit"
- Connect the local repository to GitHub. Replace
yourusernameandgaxpro-sitewith your actual values:
git remote add origin https://github.com/yourusername/gaxpro-site.git
git branch -M main
git push -u origin main
- After the push completes, refresh the GitHub repository page. The project files should be visible.
Step 6.3: Deploy to Netlify (recommended for Decap CMS)
Netlify is the recommended host if you want Decap CMS working on the live site. It provides Identity and Git Gateway, which handle authentication and Git commits on behalf of editors.
- Go to app.netlify.com and sign up or log in
- Click Add new site, then Import an existing project
- Choose GitHub and authorize Netlify
- Select the
gaxpro-siterepository - Configure the build settings:
| Setting | Value |
|---|---|
| Build command | go build -o gax ./cmd/gax && ./gax build |
| Publish directory | site |
- Click Deploy site
Netlify runs the build on every push to main. The first deploy takes a few minutes. When it finishes, Netlify gives you a URL like https://your-site.netlify.app.
Step 6.4: Enable Netlify Identity
- In the Netlify site dashboard, go to Integrations > Identity
- Click Enable Identity
- Under Registration, choose Invite only for a private site, or Open if you want anyone to sign up
- Under External providers, you can enable Google or GitHub login if you want one-click sign-in
Step 6.5: Enable Git Gateway
- In the same Identity section, scroll to Services > Git Gateway
- Click Enable Git Gateway
- Leave the Roles field blank to allow all Identity users access
Git Gateway connects Netlify Identity to your GitHub repository. When an editor logs in through the CMS, Git Gateway commits changes to the repository on their behalf. Editors do not need GitHub accounts or repository write access.
Step 6.6: Configure Decap CMS for production
Open public/admin/config.yml and set the backend to Git Gateway:
backend:
  name: git-gateway
  branch: main
Remove the local_backend line if it exists. It is only used for local development with npx decap-server. In production, Git Gateway replaces it.
Commit the changes and push:
git add .
git commit -m "Configure Decap CMS for production"
git push
Netlify rebuilds the site. After the deploy finishes, open https://your-site.netlify.app/admin/. The CMS login page appears. Log in with the Netlify Identity account you invited, and the CMS loads.
Step 6.7: Invite editors
- In the Netlify dashboard, go to Identity
- Click Invite users
- Enter the editor's email address
- The editor receives an email with a link to set a password
Once they log in, they can edit content through /admin/ without a GitHub account.
Step 6.8: Deploy to Vercel
Vercel is a strong host for static sites, but Decap CMS production setup is more involved. It requires an external OAuth proxy because Vercel does not provide a built-in Git Gateway.
- Go to vercel.com and sign up or log in
- Click Add New > Project
- Import the GitHub repository
- Set the build command and output directory:
| Setting | Value |
|---|---|
| Build command | go build -o gax ./cmd/gax && ./gax build |
| Output directory | site |
- Click Deploy
Vercel builds on every push. The site gets a URL like https://your-site.vercel.app.
For Decap CMS on Vercel, you need to deploy a separate OAuth proxy. The steps are:
- Create a GitHub OAuth App
- Deploy an OAuth proxy (for example, a Cloudflare Worker or a Vercel function)
- Set
backend.base_urlinconfig.ymlto the proxy URL - Set
backend.name: github
This is more setup than Netlify. If Decap CMS is a priority, use Netlify instead.
Step 6.9: Deploy to Cloudflare Pages
- Go to the Cloudflare dashboard, then Workers & Pages
- Click Create application > Pages > Import an existing Git repository
- Select the GitHub repository
- Set the build settings:
| Setting | Value |
|---|---|
| Build command | go build -o gax ./cmd/gax && ./gax build |
| Build output directory | site |
- Set environment variable:
GO_VERSION = 1.26
- Click Save and Deploy
Cloudflare builds on every push and gives you a *.pages.dev URL. For Decap CMS on Cloudflare, deploy an OAuth Worker and point backend.base_url to the Worker URL.
Step 6.10: Deploy to GitHub Pages
- Push to GitHub (steps 6.1 and 6.2)
- Add a workflow file to
.github/workflows/deploy.yml - Configure the workflow to build with Go and upload the
site/folder - Enable GitHub Pages in repository settings
The project includes example workflows in .github/workflows/. Rename deploy.yml.example to deploy.yml to enable automatic deployment on push.
Note: GitHub Pages free requires a public repository. Decap CMS on GitHub Pages requires an external OAuth proxy.
Step 6.11: Deploy to a VPS
Build locally:
./gax build
Upload the site/ folder to the server:
rsync -avz site/ user@your-server:/var/www/gaxpro/
Point your web server (Nginx or Apache) to /var/www/gaxpro/.
For automated deploy, use an SSH deploy action in GitHub Actions. The project includes example workflows in .github/workflows/.
Step 6.12: Deploy to cPanel
- Build locally:
./gax build - Open cPanel File Manager
- Go to
public_html - Upload the contents of the
site/folder
Note: Decap CMS production works on Netlify only. On cPanel, use the site without Decap CMS.
Deployment comparison
| Provider | Free tier | Git deploy | Decap CMS production |
|---|---|---|---|
| Netlify | Yes | Yes | Yes — Identity + Git Gateway |
| Vercel | Yes | Yes | External OAuth proxy required |
| Cloudflare Pages | Yes | Yes | External OAuth proxy required |
| GitHub Pages | Yes (public repo) | Yes | External OAuth proxy required |
| VPS | Paid | Manual or CI | External OAuth proxy required |
| cPanel | Paid | No | No |
Step 7: SEO Defaults
GAX Pro includes SEO defaults on every page. No plugin or manual configuration.
What is generated
- Title tags — from frontmatter
title - Meta descriptions — from frontmatter
description - Canonical URLs — from frontmatter
canonical - Open Graph tags — for social sharing
- sitemap.xml — full page index for search engines
- rss.xml — feed for blog readers
- robots.txt — crawler rules
- JSON-LD — structured data for articles and organization
- Every page has a unique title and description
- Canonical tag points to the production URL
sitemap.xmlandrobots.txtare generated- Open Graph image and description are set
- Heading hierarchy is correct (one H1 per page)
- Images are compressed
SEO checklist before deploy
Step 8: Troubleshooting
Build fails with "go: command not found" — Go is not installed or not in your PATH. Reinstall from go.dev/dl.
Build fails with "gax: command not found" — the binary was not built. Run go build -o gax ./cmd/gax first.
Port 8080 already in use — another process is using the port. Close the other process or change the port in the GAX configuration.
Site deploys but CSS is missing — the asset paths in the theme are absolute. Make sure the public/ folder was copied to the output. Check the host's publish directory setting.
CMS shows "Failed to load config" — the config.yml path is wrong. Check that public/admin/config.yml exists.
Changes in the CMS do not save — the Decap CMS proxy is not running. Check Terminal 2.
CMS login fails on Netlify — check that Identity is enabled, Git Gateway is enabled, and the Identity widget script is in public/admin/index.html.
Changes in the CMS do not appear on the live site — Netlify rebuilds on Git commits. Check that the commit reached the repository. If the build is slow, wait a minute and refresh.
Thank You
Thank you for choosing GAX Pro.
You now own a premium Go static site theme for life. Unlimited sites, commercial use, lifetime updates.
What you can do now:
- Build your site
- Customize the theme
- Deploy anywhere
- Use it for client projects
- Read the docs again: gaxpro.axcora.com/docs
- Contact us via Fiverr: fiverr.com/creativitas
- Browse more themes: hockeycomputindo.com
Need help?
Happy shipping.
GAX Pro Team
Frequently Asked Questions
What buyers ask about GAX Pro — Premium Go Static Site Generator Theme | Hugo Alternative
What is GAX Pro, and what problem does it solve?
GAX Pro is a premium theme for the GAX Go static site generator. It ships with a full layout set, iSimple Docs, Decap CMS configuration, SEO defaults, and starter content. Instead of designing a site from scratch, you extract the theme, run one build command, and start editing Markdown and YAML. It is built as a Hugo alternative for teams that want familiar templates without the heavy Go template syntax.
Do I need to know Go to use GAX Pro?
No. You write content in Markdown and set page metadata in YAML. The theme layouts handle the rendering. Go knowledge is only needed if you want to modify the engine itself. The binary is pre-built or buildable with one command.
How do I install and run GAX Pro locally?
Install Go 1.26 or newer from go.dev/dl. Download GAX Pro from Gumroad and extract the ZIP to a project folder. Open a terminal, go to the project folder, and run go build -o gax ./cmd/gax. Then run ./gax and open http://localhost:8080 in your browser.
How do I configure the site?
All site settings live in _data/config.yaml. Open it with any text editor. You can change the site title, description, navigation menu, footer columns, social links, and brand name. Save the file and run ./gax build again. The changes appear on every page.
How do I add content?
Content lives in the content folder. Each Markdown file becomes a page. Static pages: content/about.md becomes /about/. Blog articles: content/blog/my-article.md becomes /blog/my-article/. Docs pages: content/docs/my-doc.md becomes /docs/my-doc/. Set the sort number in docs frontmatter to control sidebar order. The site rebuilds when you run ./gax build.
Does GAX Pro include a CMS?
Yes. GAX Pro is configured for Decap CMS. For local development, run npx decap-server in one terminal and ./gax in another, then open localhost:8080/admin/. For production, use Netlify Identity and Git Gateway. Editors log in with email and password, no GitHub account needed.
Is SEO handled automatically?
Yes. Every build generates sitemap.xml, rss.xml, and robots.txt. Title tags, meta descriptions, canonical URLs, Open Graph tags, and JSON-LD come from frontmatter. No plugin or manual meta wiring per page.
How do I deploy GAX Pro?
Run ./gax build to create the site folder. Upload it to Vercel, Netlify, Cloudflare Pages, GitHub Pages, cPanel, or a VPS. For Vercel, Netlify, and Cloudflare Pages, the build command is: go build -o gax ./cmd/gax && ./gax build. The output directory is site. Decap CMS production works on Netlify only.
What is the license, and where can I see the demo and get support?
GAX Pro is a one-time purchase at $155. You own 100 percent of the source and can use it on unlimited personal and client projects. The license does not permit reselling or redistributing the theme itself as a competing product. Live demo gaxpro.axcora.com. Download creativitaz.gumroad.com/l/gaxpro. For support, contact us via Fiverr. Custom builds are available through the Fiverr link in the article.
URL: https://www.hockeycomputindo.com/themes/golang/ssg-jamstack-hugo-brother-gaxpro/
Embed — Cloudinary
GAX Pro — Premium Go Static Site Generator Theme | Hugo Alternative
https://www.hockeycomputindo.com/themes/golang/ssg-jamstack-hugo-brother-gaxpro/
DOWNLOAD →$155 - Own 100%
GAX Pro — Premium Go Static Site Generator Theme | Hugo AlternativePremium Go static site generator theme and Hugo alternative. SEO defaults, Decap CMS, iSimple Docs, auto collections, zero node_modules. One-time $155, unlimited sites.
DOWNLOAD →DEMO →Features
go-126-gax-engine
documentation-landing
sidebar-nav-search
decap-cms
seo-auto
markdown-yaml
contact-form
responsive-fast
own-100-source
Dax Pro Premium .NET Static Site Generator Theme Decap CMS →
Need Custom?
Hire via Fiverr Escrow
72+ verified reviews, escrow protected.
ORDER CUSTOM →Selected Premium Themes
A focused collection, not a marketplace.


Custom Web Architecture
Escrow Protected
Headless commerce, booking systems, static site generators, and AI automation — engineered for speed, SEO, and full ownership. No subscriptions, no lock-in. - Commerce, booking, SSG, AI — built to own, not rent.
Rank-Ready Premium Website — Forensic SEO, 100 PageSpeed
Your competitors rank, you don't. Get a premium website with forensic SEO architecture — semantic HTML, canonical tags, Open Graph, JSON-LD, sitemap — crafted to rank and convert. 100 PageSpeed score from day one. No monthly fees, no rented platform.
Order Now -> Static Site GeneratorFree-Hosting JAMstack Migration — Jekyll, Astro, 11ty
Still paying monthly for a static website? Migrate from WordPress to high-performance JAMstack — 90+ PageSpeed, $0 hosting bill, content stays in your Git repo. Fast, secure, and fully yours.
Order Now -> Web PresenceLightweight Flat-File CMS — No WordPress Bloat
WordPress slow and vulnerable? Get a custom flat-file CMS with MySQL or SQLite — fast, secure, and 100% yours. No plugin updates, no security patches, no bloat. Just performance.
Order Now ->